

|
|
From the DRC notebook:
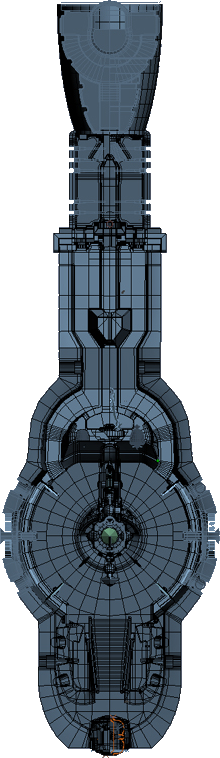
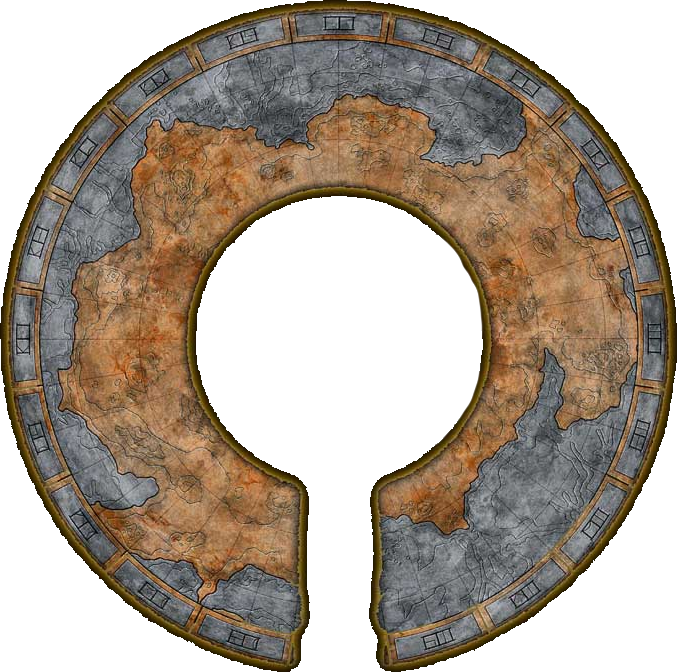
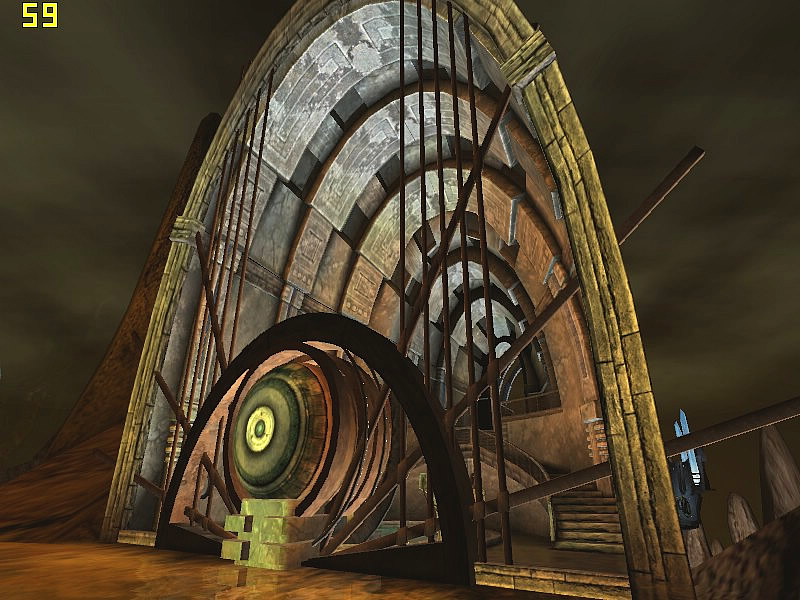
This picture is an overview of the Great Zero Monumental Building. This picture is oriented with the observation room at the bottom. The red light on a staff atop the observation room is the northern end and faces toward the Arch of Kerath, and can be seen from almost anywhere on Ae'gura Island.
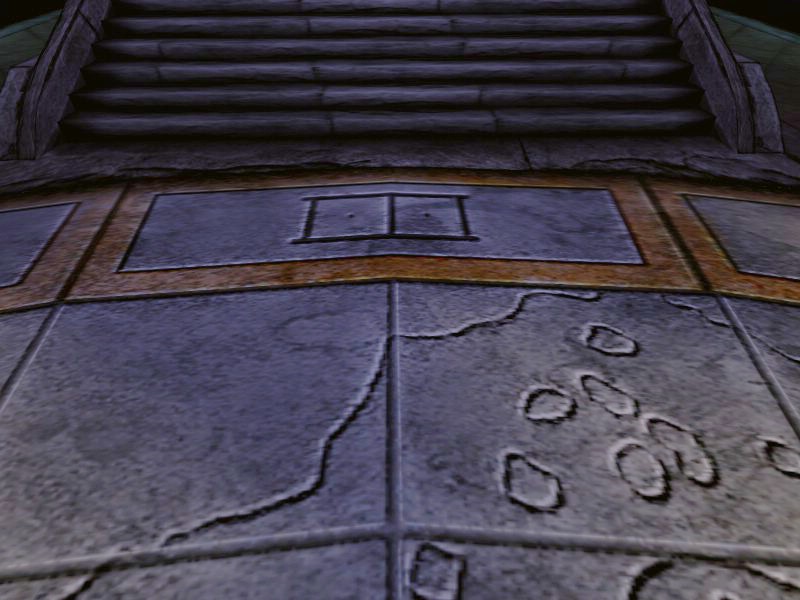
The official prime meridian runs on a line extending down the decorative meridian strip through the Guild Hall, Tokotah Courtyard, down the Great Stairs and through the center of Kerath's Arch. The meridian strip marks the direction magnetic north would have been at the time the Cavern was colonized. In the Great Zero Courtyard, the prime meridian is marked on the floor with a radiating line and the D'ni number "00". The Prime Meridian:
The Great Zero is divided into three main areas.
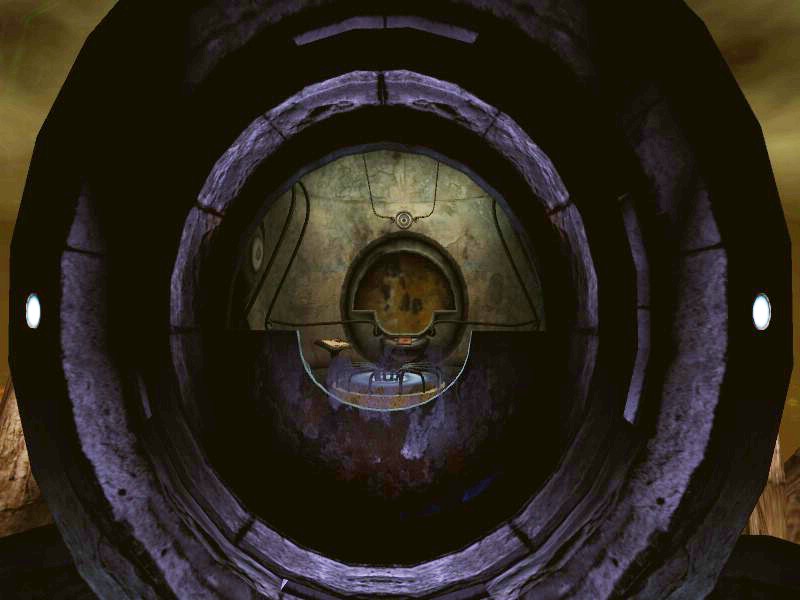
The Great Zero Observation room: The Great Zero Observation room (GZO) is also known as the Great Zero Antechamber in some documentation such as the DRC notebook. It is a small chamber that overlooks the Great Zero courtyard at its south end, and overlooks the Cavern at its north end. There is a DRC notebook, a Nexus linking book, and a machine that upgrades one's KI. Upgrading your KI generates a marker mission, and after you have collected the markers, you can return to upload the data into the machine. Completing the mission adds the Great Zero Courtyard to the Personal Links in your Nexus. The Great Zero Observation room is accessed via linking books found in any of the neighborhood common libraries, typically being the book on the right side of the back wall. After you link there, a linking page appears in the City book on your Relto's bookshelf. The neighborhood common library is also called the "book room" by explorers. Looking into the observation room from the Great Zero Courtyard. Visible are the KI machine, DRC notebook, and Nexus linking book.
The Great Zero Courtyard: The Great Zero Courtyard is below the Observation room and holds the neutrino fan emitter, or dispenser as the DRC notebook calls it. Around the machine is a topographical map inlaid into the flooring. The map is a representation of the D'ni Cavern, with the neutrino dispenser sited where Ae'gura Island would be. There was confusion about this map for a long time because it doesn't look like the cavern shown on Aitrus' Journey to the Surface document, but it is Aitrus' map that is inaccurate. He was much more concerned about the calculations and angles of the tunnels they were boring than with getting the caverns right.
There is a balcony overlooking the courtyard with another KI terminal and a Nexus book. The terminal can be used to download and upload a second marker mission. At the far end of the Courtyard are corridors leading to doors to the Calibration Center. The doors to the Calibration Center are locked until the second marker mission is completed.
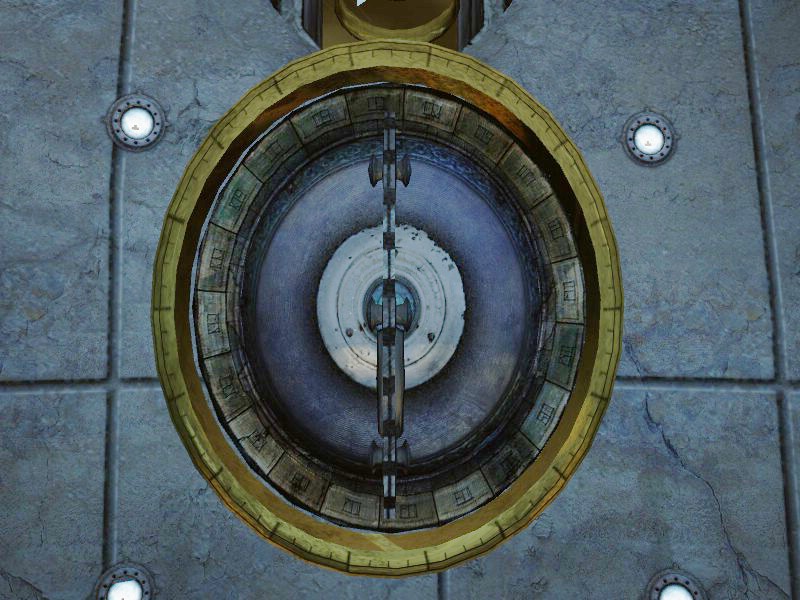
Scattered around the courtyard are small domes with spinning rings around them. It is unknown whether they serve a useful function or are just decorative models of the Great Zero device itself. Similar mechanisms can be found in the calibration room.
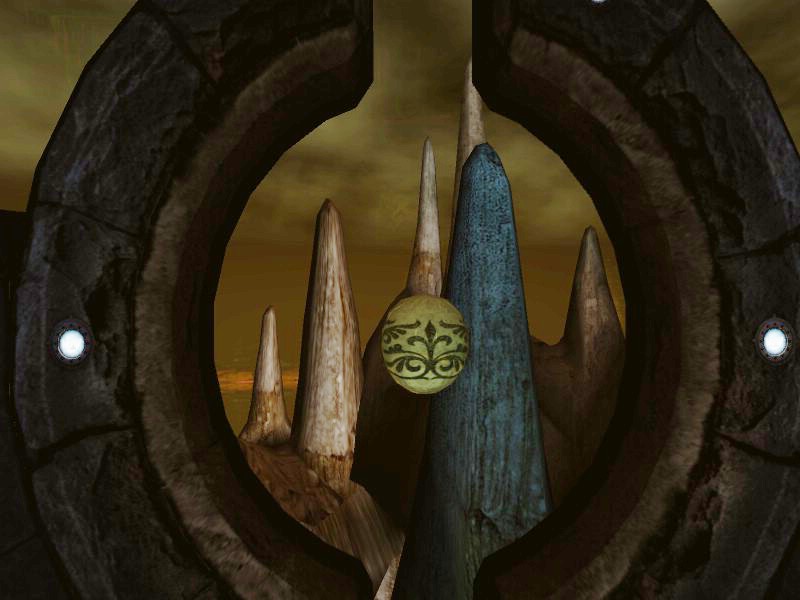
On either side of the courtyard are incomplete stone rings that may have inspired Kadish in his designs for Tolesa. There are decorative balls floating in the center of the rings. The balls are inlaid with a design that is repeated on many of the surfaces around the building complex, including the bowls that make up the body of the KI machines. These balls may be another use of rock from Rebek, which floats naturally.
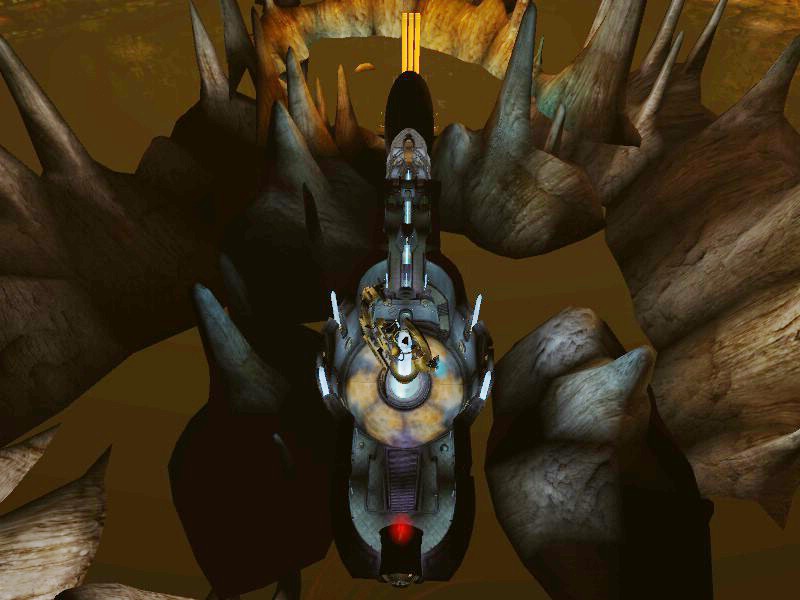
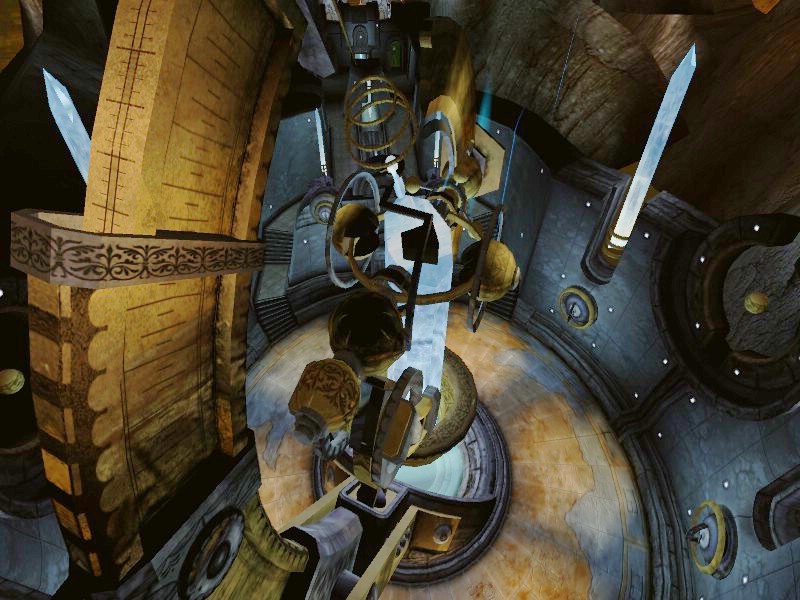
The Great Zero is, according to the DRC notebook, a neutrino emitter that sends out a fan-shaped spray of particles. When they pass through objects, the particles leave behind a brief blue glow that looks like a solid line. In this picture, you can see part of the fan of particles, and the glowing line on the side of the courtyard and the rocks beyond caused by the particles passing through them. They are completely safe and do not cause any health problems, nor do they react to non-mineral materials, so no line appears when passing through people or their clothing.
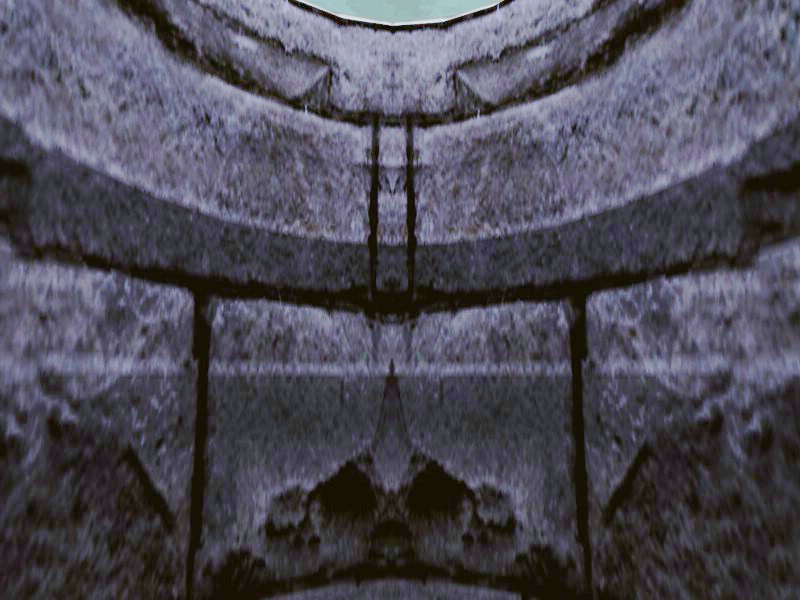
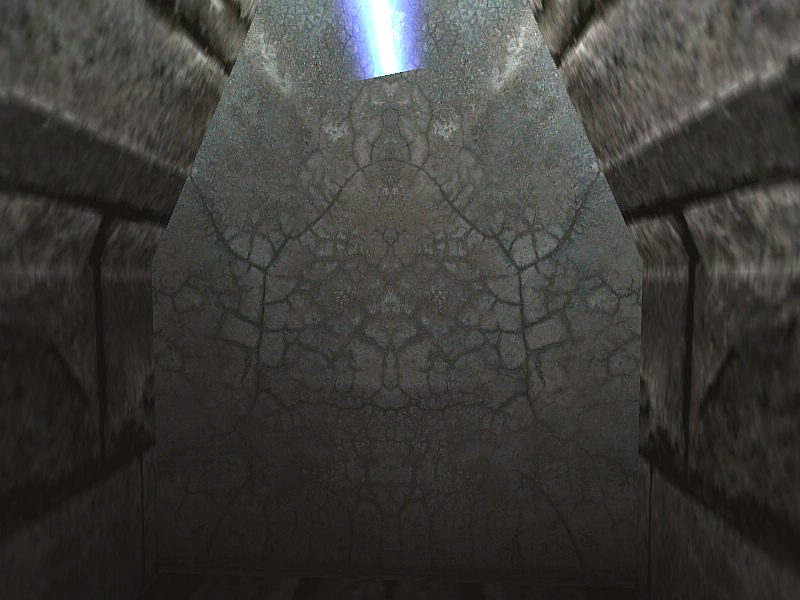
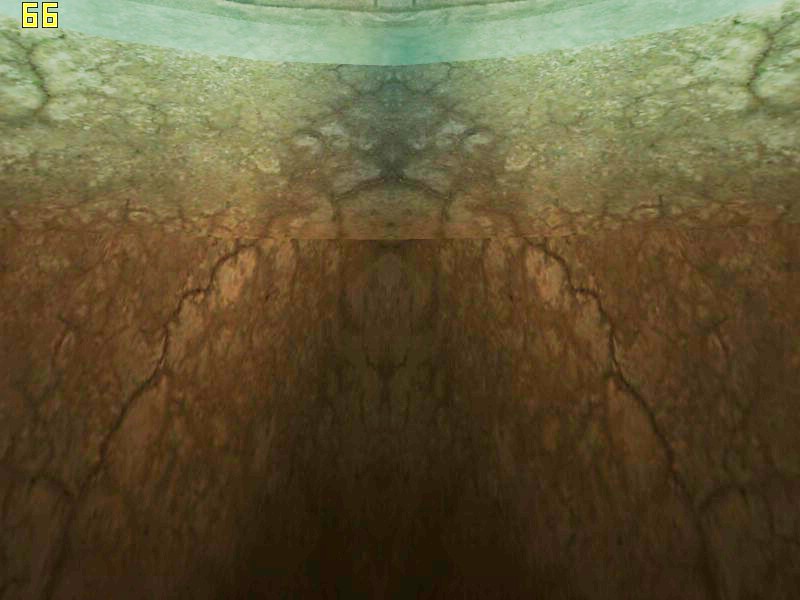
There is a well below the Great Zero device, which contains some peculiar marks on the walls facing north and south.
The marking on this side of the well look, from top to bottom, like two crosses above a diamond, with two heavy black lines on either side of the diamond. Below them is what looks like a diamond shape atop a mountain range that continues into the surrounding stone blocks. The designs are bilaterally symmetrical.
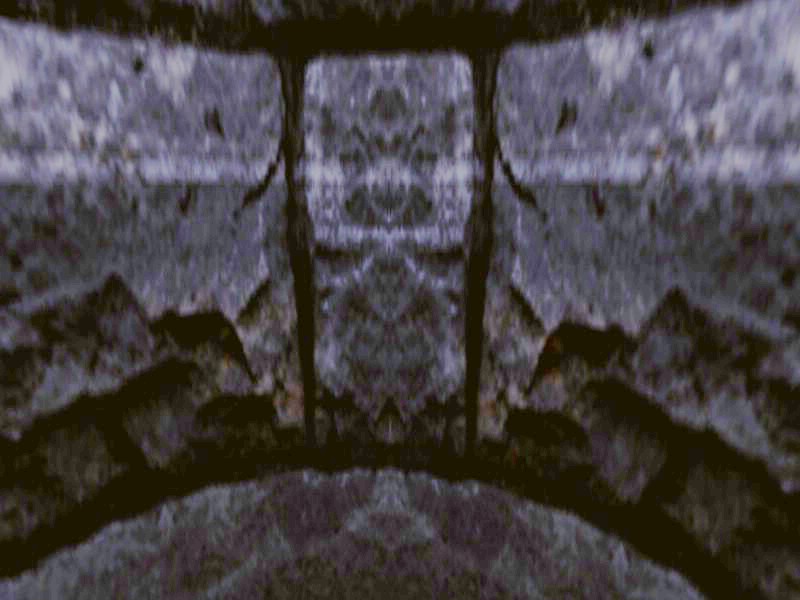
On this side of the well, there appear to be two coats of arms. The top one may have a crown above an "m" shape, and a bird in the center with two leaf patters on either side of it. The lower one appears to be a bird with a crown above it and two unidentified shapes below its tail. The mountain patterns from the other side continue all the way around. Just below the coat of arms is what looks like a representation of the Arch of Kings.
There are other markings on the walls the neutrino beam passes through when traveling from the Calibration Center to the Zero. These are less identifiable.
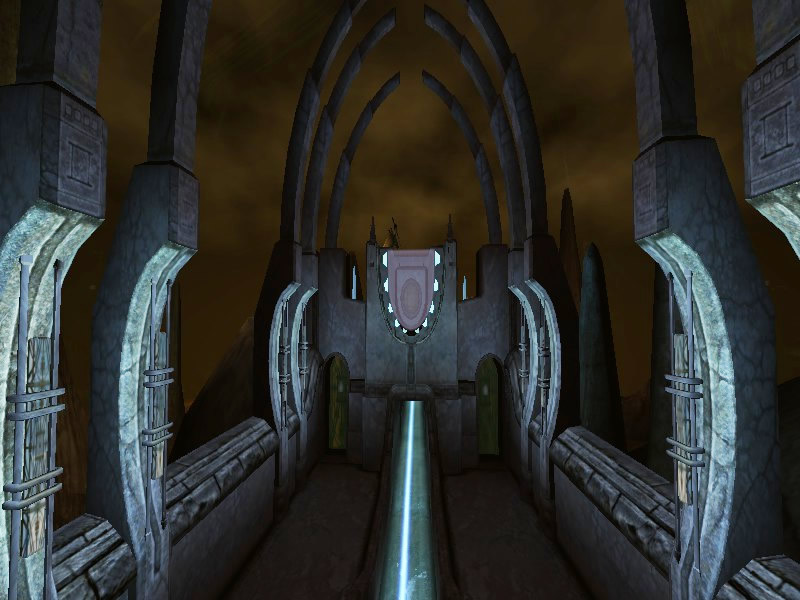
To reach the Calibration Center, one must pass through this divided corridor that leads to the doors into the Center.
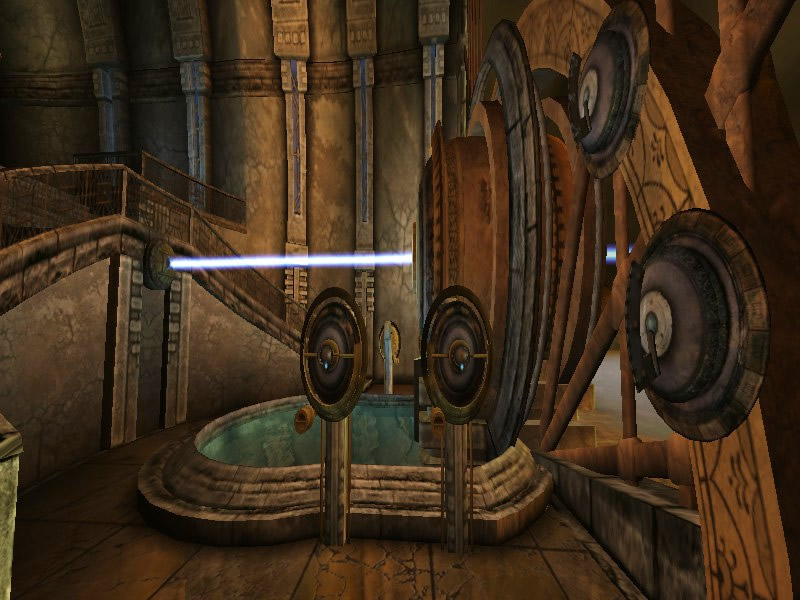
The Great Zero Calibration Center: This area contains the four Great Zero Maintenance Units. The maintenance units were originally used to calibrate the Great Zero itself, and held missions to give the machinery information on distance, elevation, and azimuth, with each machine serving a specific function. After the Great Zero was reactivated, the machines were converted to calibrate individual KI devices, and the machines now all show the same data. The Maintenance Units allow an explorer to select any of eighteen marker missions. To calibrate one's KI, all eighteen missions must be completed. In this photo, the GZMUs are the devices with the KI reader niches. There are two on each side of the pool of water.
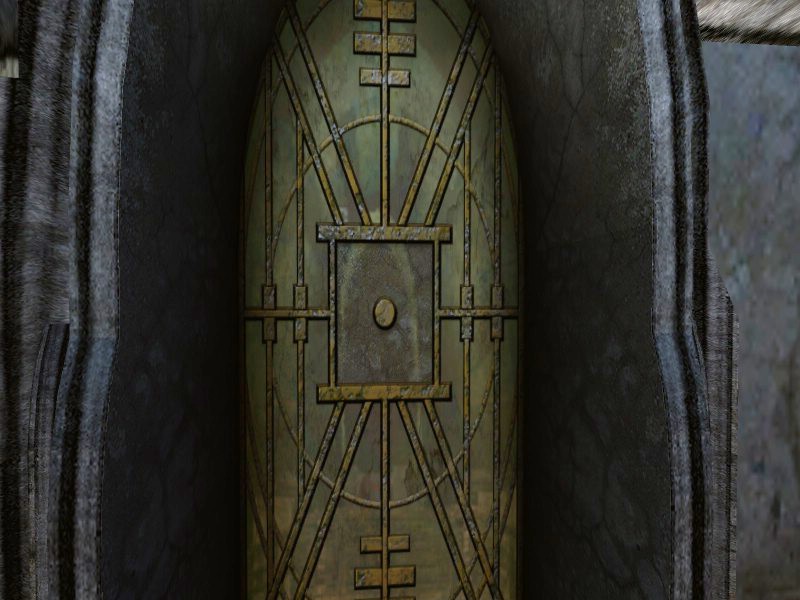
There are two locked doors inside the Center, which are translucent. You can just make out a room with an arched doorway at the other end:
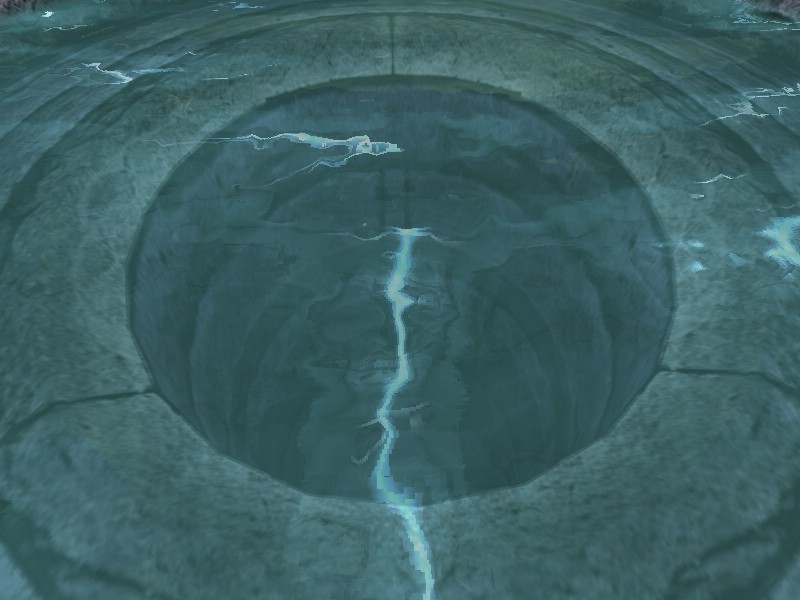
Between the calibration machines, there is a pool of water. Inside the pool is another of the strange markings. I call this one the King, and it could be a representation of Ri'neref in full regalia as the first King of D'ni. That is, however, mere speculation since the monumental building was constructed during his reign. There is controversy regarding the markings along the path of the neutrino beam. Some say that they are merely natural cracks and patterns in the stone. I disagree, based on three facts. First, the neighboring stones around each marking show no sign of the same type of pattern. Second, the marks are both regular and bilaterally symmetrical. Third, the marks are only found on the precise north and south faces of the walls. Taken all together, this leads me to believe they are not natural, and were made deliberately by the workers who constructed the building.
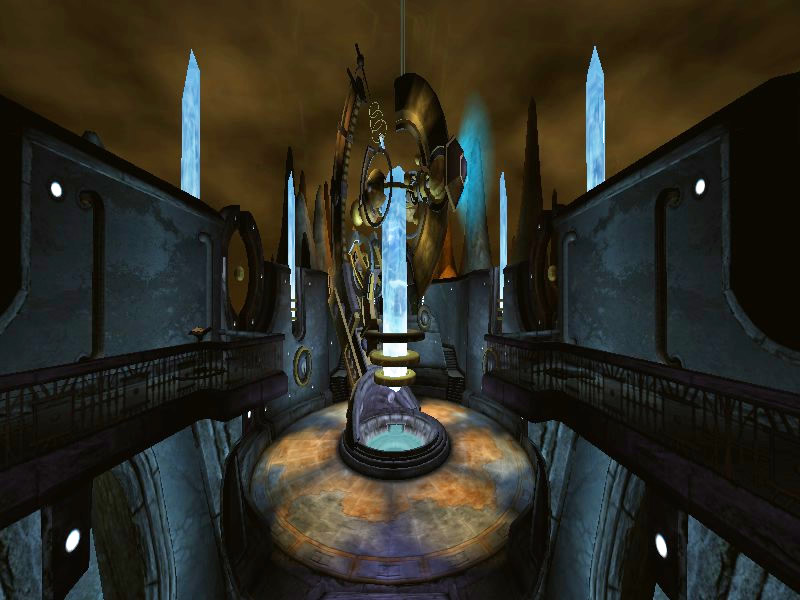
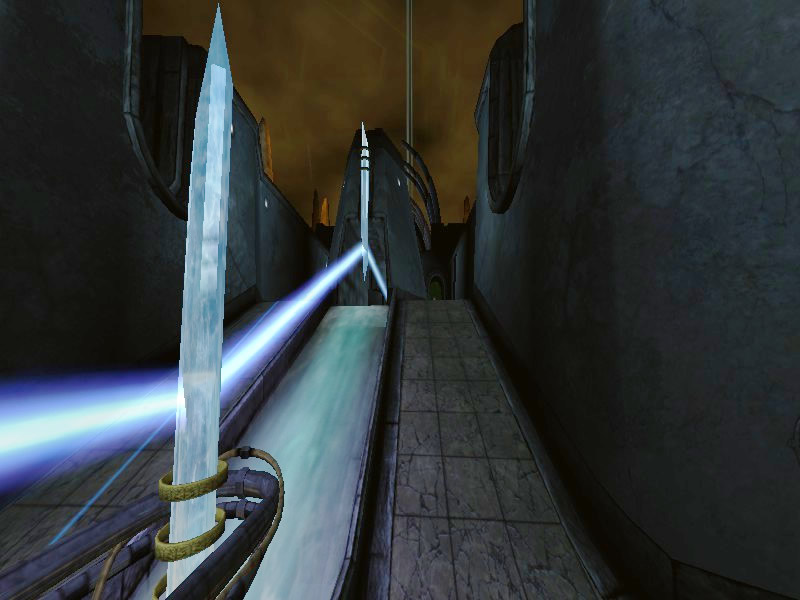
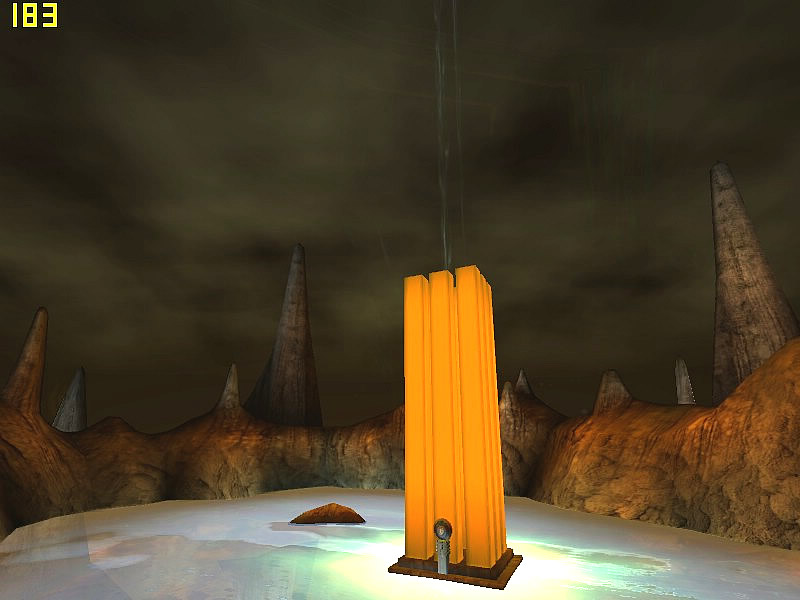
The Calibration Center overlooks a glowing lake, in the center of which is the neutrino collector device. In front of the collector, there is an emitter that generates a beam of neutrino particles, which enter the Center and are directed to the Great Zero machine itself. There are pools and streams of water running under the beam, possibly to absorb stray neutrino particles but more likely just as a decorative touch. Crystals are suspended along the path of the beam to direct and regulate the flow of the particles. The outside of the Calibration Center:
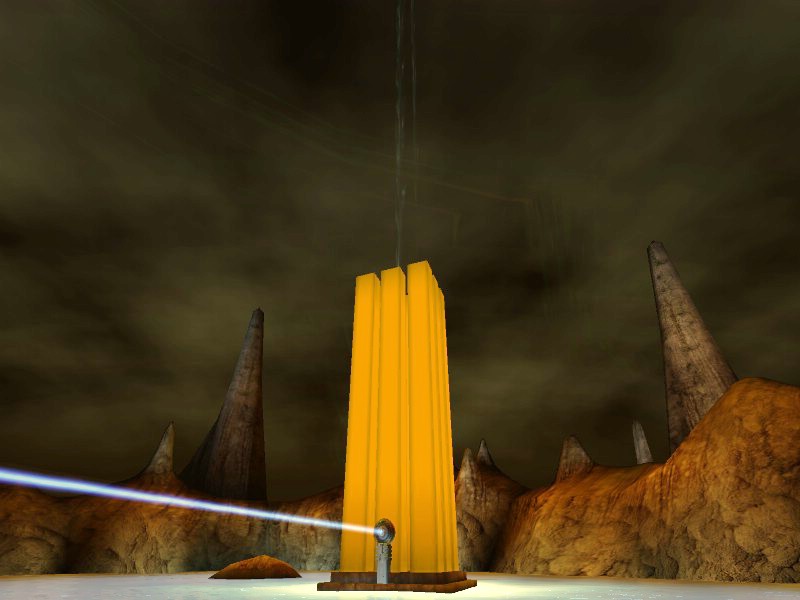
The collector is made up of eight glowing columns, arranged in a hollow square, with an concentrator/ emitter for the beam of collected neutrinos. The beam is passed to other concentrators to keep the beam tight and focused. At the time the DRC discovered the Cavern, the Great Zero was in standby mode, and needed to be recalibrated before it could function. Recalibration was accomplished by explorers, who ran marker missions to locate specific spatial points for the Great Zero Maintenance Units (GZMU) using their KI devices. At the time, the state of the recalibration effort was shown in a report posted on the viewer in the Great Zero Courtyard by Victor Laxman. Eventually, the recalibration of the Great Zero was completed and it was activated. Since the activation, a blue line of light caused by the neutrino fan sweeps across Ae'gura at regular intervals. This effect evidently has a maximum range, however, since it is not visible in K'veer, the neighborhoods, or the Er'cana pellet testing chamber. The neutrino collection tower before and after activation:
Since the DRC notebook dates from the time before the Great Zero was activated, the statement about the calibration image (the imager in the hallway leading to the calibration center) is obsolete. Victor Laxman's reports on the activation status are long gone. The viewer is the shield-shaped device at the top of the wall which divides the Calibration Center from the corridor to the courtyard.
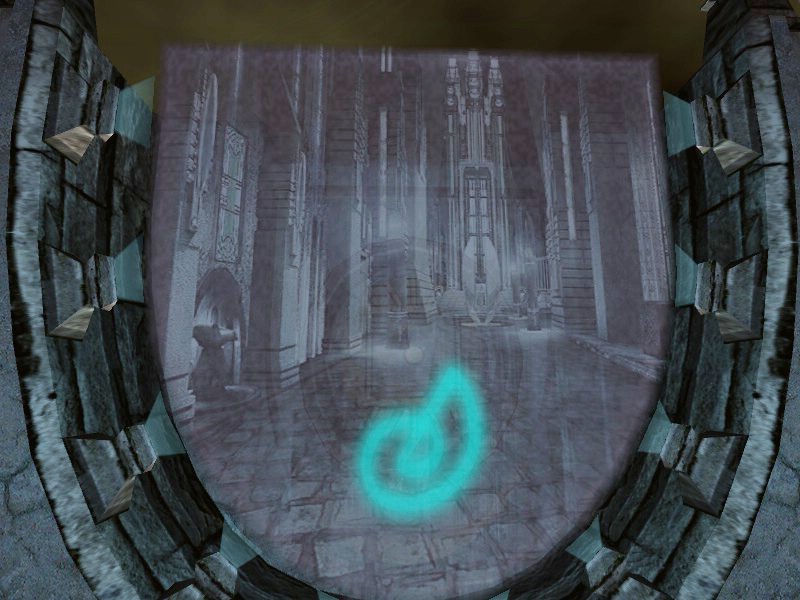
After the initial calibration and activation of the Great Zero, the viewer showed an artist's rendering of Tokotah Alley for a long time. It was presumably an image of the Alley from just before the Fall since the Nexus terminal is present. It bore a glowing shell glyph that was identical to the one from Yeesha's Path of the Shell quest, and which may have been added by her for whatever reason she might have had. More recently, the viewer shows a simple Great Zero symbol. This is the image that used to be displayed. It is recogizable as Tokotah Alley by the Nexus terminal niche and the columns of Tokotah I on the right.
|

Myst, the Myst logo, and all games and books in the Myst series are registered trademarks and copyrights of Cyan Worlds, Inc. Myst Online: Uru Live is the sole property of Cyan Worlds Inc. The concepts, settings, characters, art, and situations of the Myst series of games and books are copyright Cyan Worlds, Inc. with all rights reserved. I make no claims to any such rights or to the intellectual properties of Cyan Worlds; nor do I intend to profit financially from their work. This web site is a fan work, and is meant solely for the amusement of myself and other fans of the Myst series of games and books. |